Azure DevOps Release Pipeline
1 Azure DevOps Project Setup
The Azure DevOps Release Pipeline is configured to promote Boomi packaged components from Development, to Stage, and to Production with an optional approval step before Production.
1.1 Create Azure DevOps Project
Login to your company’s ADO (Azure DevOps) Organization from the Azure Portal and create a project. The project created below is called Boomi CICD Demo, but select a name specific to the project.
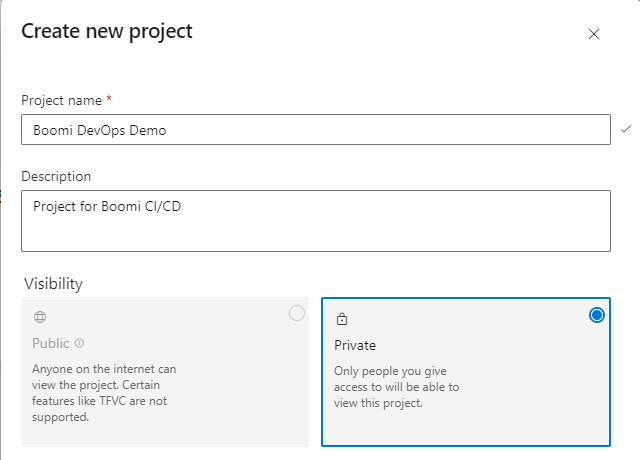
Figure 1. Create ADO Project
An ADO Project can contain multiple repos. This guide will create 2 repos: boomi-cicd-cli-py and boomi-cicd-release. The boomi-cicd-cli-py repo will contain the Boomi CICD CLI scripts and the boomi-cicd-release repo will contain the release pipeline configuration file. Any name for the repos can be used, but the guide will use the names above.
1.2 Import the CI/CD Repo
Initialize the first repo. To do this, navigate to Repos in the left toolbar and select “Initialize main branch with a README or gitignore” in the bottom middle. Once created, you will be able to create a new repo called boomi-cicd-cli-py.
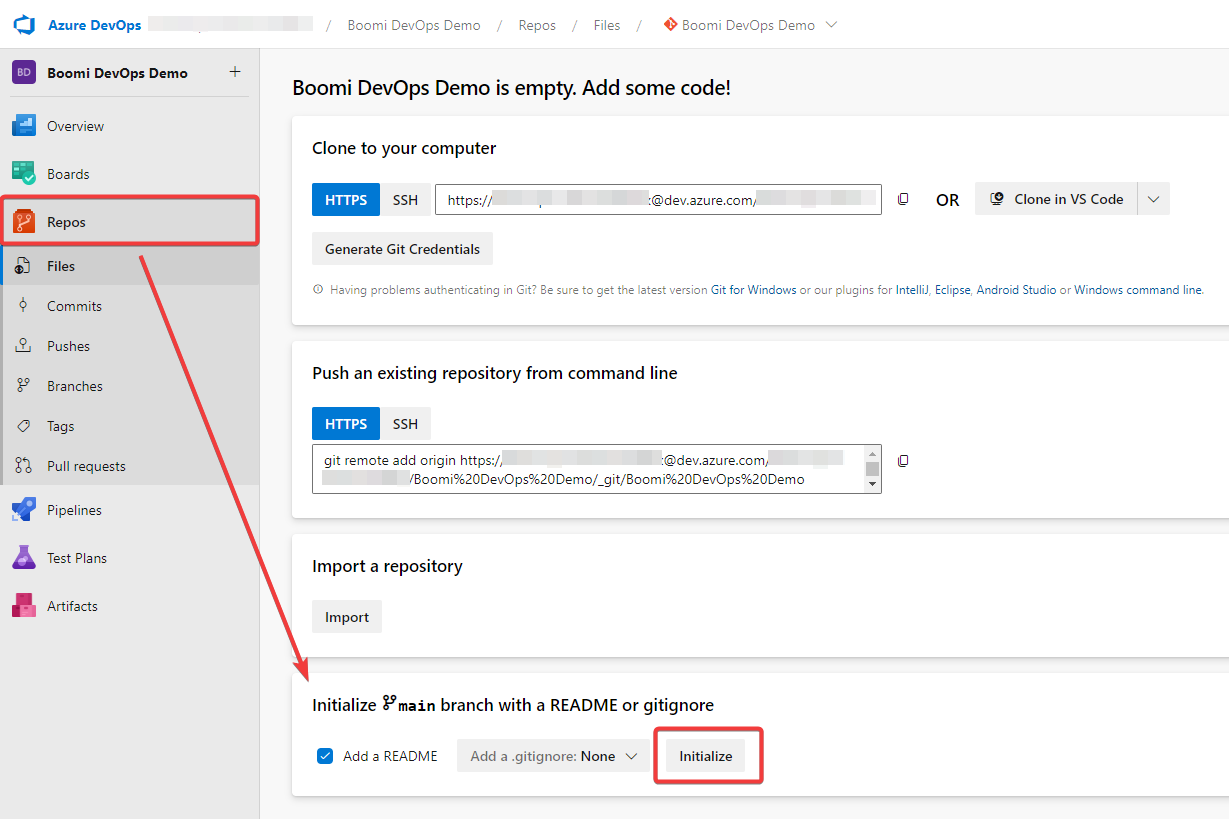
Figure 2. Create boomi-cicd-cli-py Repo
Next go to the officialboomi Bitbucket boomi-cicd-cli-pi repo. This repo will be cloned to create the ADO repo in the new Project. Copy the URL. This URL will be used in Step 4.
Navigate back to the new project. Then select Repos on the left -> Repo dropdown -> Import a repository and do not add README
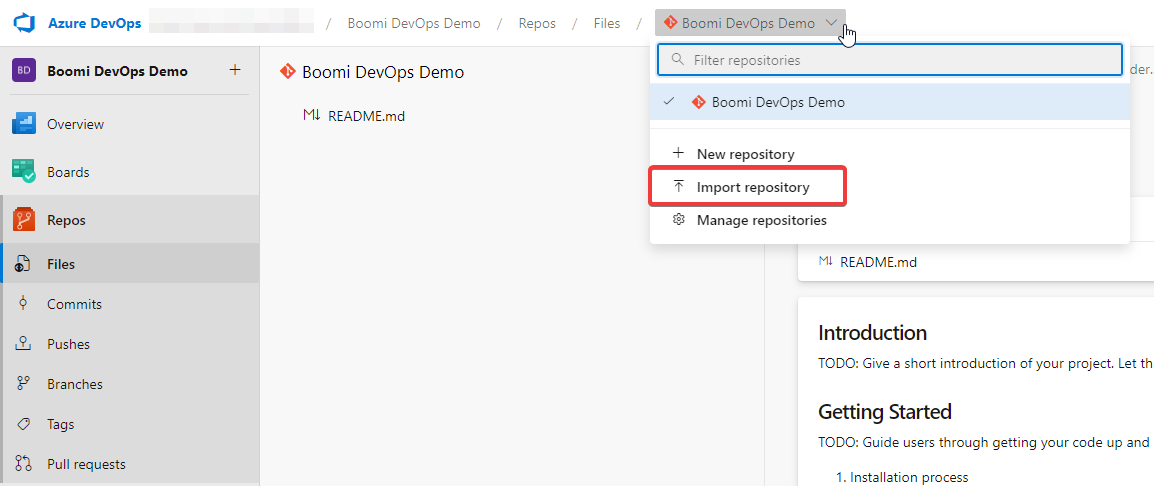
Figure 3. Import Repo Selection
Choose Git from drop and set the Clone URL, add the URL from Step 2, and set the name to boomi-cicd-cli-py.
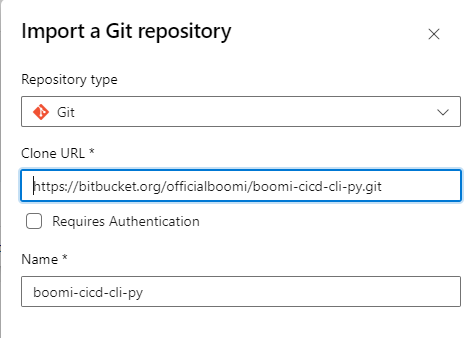
Figure 4. Import boomi-cicd-cli-py Repo
The repo name will be set to boomi-cicd-cli-py. This value will be used within the
BOOMI_CLI_BASE_DIRlibrary variable.
1.3 Create Boomi Release Repo
The release repo will be used to store the release configuration file. All Integration users must have contribution access to this repo.
Repos -> New Repository -> Repository Name: boomi-cicd-release -> Make sure “Add a README” is checked to initialize the repo -> Click Create
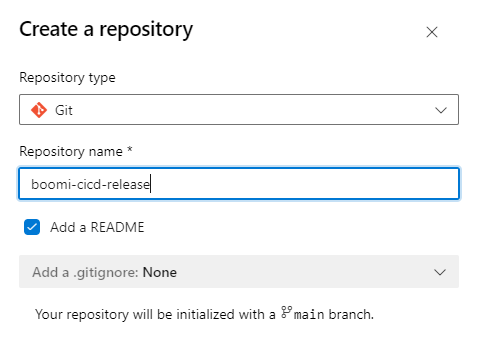
FIgure 5. Create Release Repo
A common directory structure is to create a boomi_release directory and place all release json files within that directory. Additionally, this can allow for the release repo to contain configuration files for other tools.
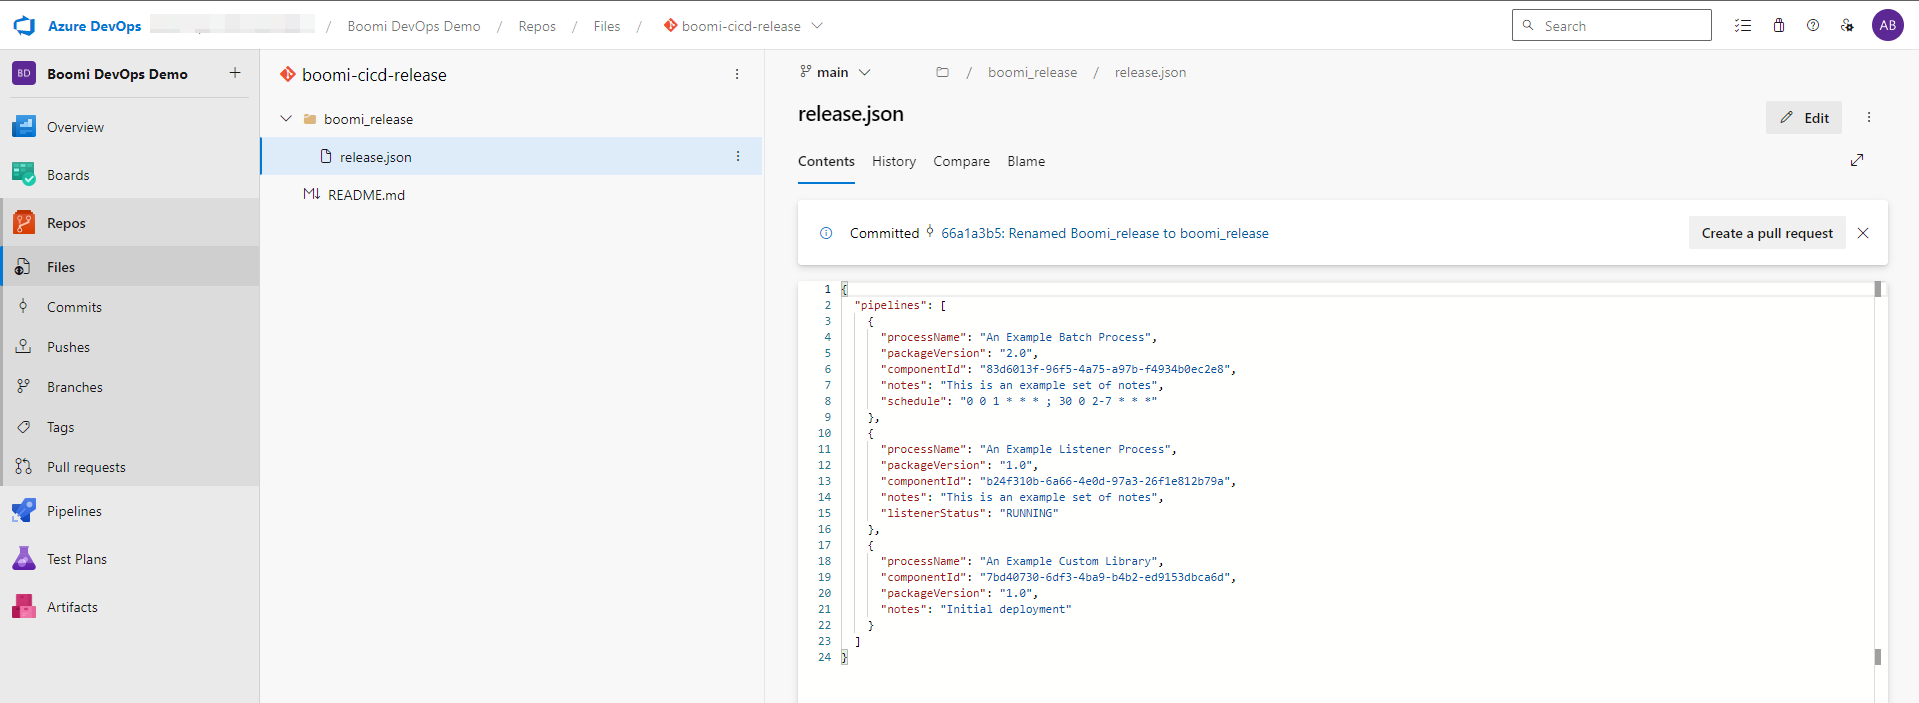
FIgure 6. Release Release Repo Directory Structure
1.4 Configure the Azure DevOps Library
Configure ADO project to the Boomi Account. There are additional environment variables that can be configured when using additional scripts (i.e. environment_extensions_update.py and component_xml_code_quality.py) The following are the required environment variables for the release_pipelin.py script.
Under Pipelines go to Library -> Variable group -> (+) Variable Group
Variable group name: boomicicd (this name is used within the pipeline)
Description: Account details for Boomi CICD
Link secrets if you choose to use Azure key vault.
Click +Add to add variables below. It is recommended to use a Boomi API token with a service account and not username/password.
BOOMI_TOKEN.is prefixed to the user name and the token can be recieved from Settings within the Boomi Platform.Click the lock next to BOOMI_PASSWORD to mask the value. The lock will ensure that others will not be able to view the value and will not be able to log the value.

Figure 7. Azure DevOps Library
Environment Variable |
Values |
|---|---|
BOOMI_ACCOUNT_ID |
<boomi-account-id> |
BOOMI_BASE_URL |
|
BOOMI_CLI_BASE_DIR |
$(System.DefaultWorkingDirectory)/boomi-cicd-cli-py |
BOOMI_PASSWORD |
<boomi-api-token> |
BOOMI_RELEASE_BASE_DIR |
$(System.DefaultWorkingDirectory)/boomi-cicd-release |
BOOMI_USERNAME |
BOOMI_TOKEN.<username> |
2 Release Pipelines
2.1 Create a Release Configuration File
A Boomi release file is required to trigger a release pipeline to deploy Boomi components. A template of Boomi release file is located within boomi_cicd/templates. Use a directory structure from section 1.4 to store configuration files.
2.2 Import the Release Pipeline
Click on Pipelines -> Release -> New -> then create a new empty Release Pipeline. It can be deleted later. Azure DevOps requires one Release Pipeline to be created before one can be imported.
Click on Pipelines -> Release -> New -> Import Release Pipeline
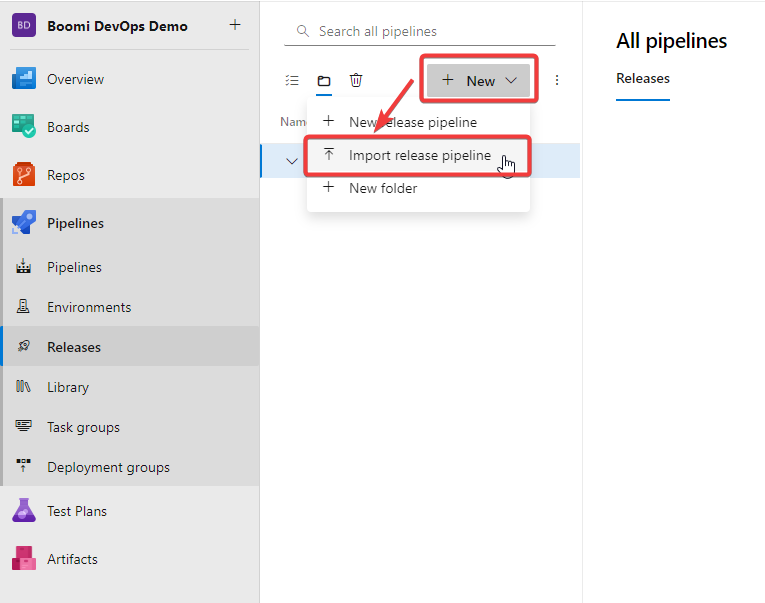
FIgure 8. Import Release Pipeline
Download the
Boomi General Release Pipeline.jsonfromboomi_cicd/templates/azure_devops/in the imported repo and select the file and click OK.
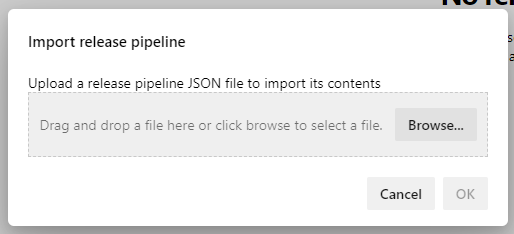
FIgure 9. Import Release Pipeline
Update the release name to remove the word “Copy”.

Figure 10. Update Release Pipeline Name
Add both Azure Repos made in section 1.2 and 1.3. Click Add an Artifact -> On the slide out select Azure Repo -> then select your first repo -> Fill out the information with the data below. Then do this again for the second repo. Configure artifacts as shown below.
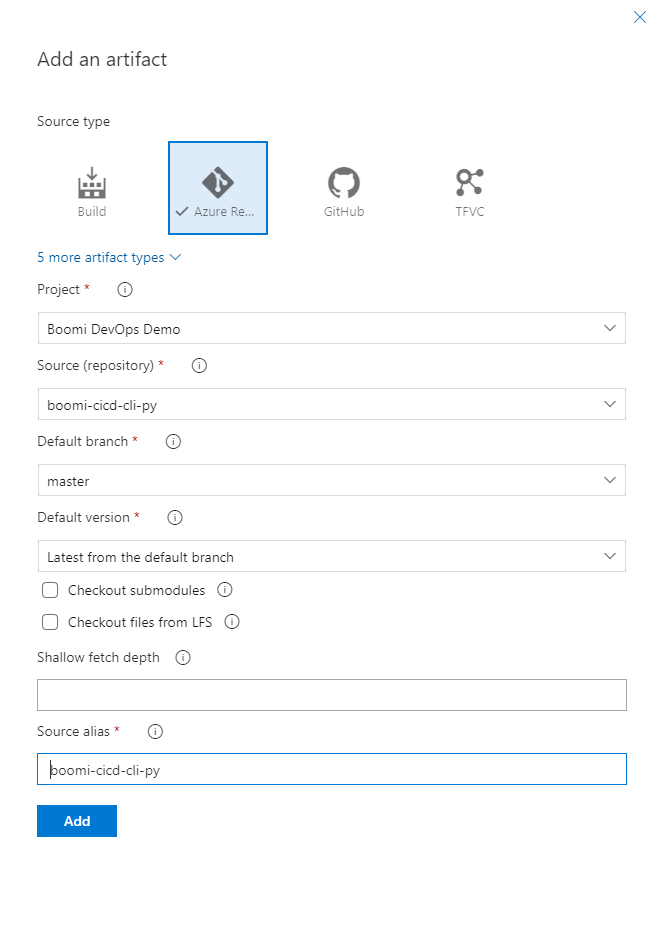
Figure 11. Add first repo to the release pipeline artifacts
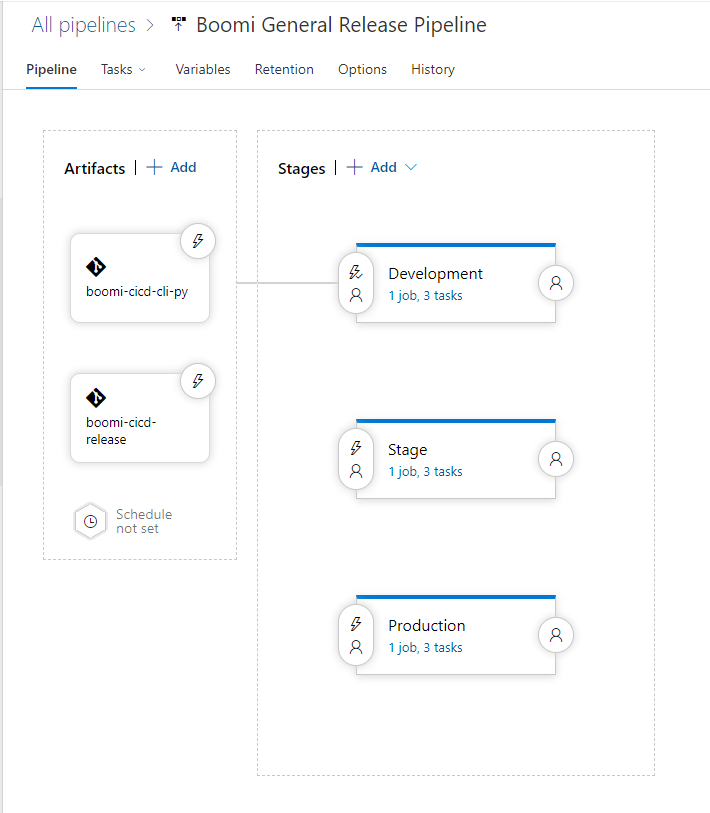
Figure 12. Release pipeline after both repos have been added
Field |
Value |
|---|---|
Project |
Boomi DevOps Demo |
Source (repository) |
boomi-cicd-cli-py or boomi-cicd-release |
Default branch |
main or master |
Default version |
Latest from the default branch |
Source alias |
boomi-cicd-cli-py or boomi-cicd-release (remove the initial underscore) |
Navigate to the Task drop down. Then configure an agent pipelines for all the Tasks shown in the image below.
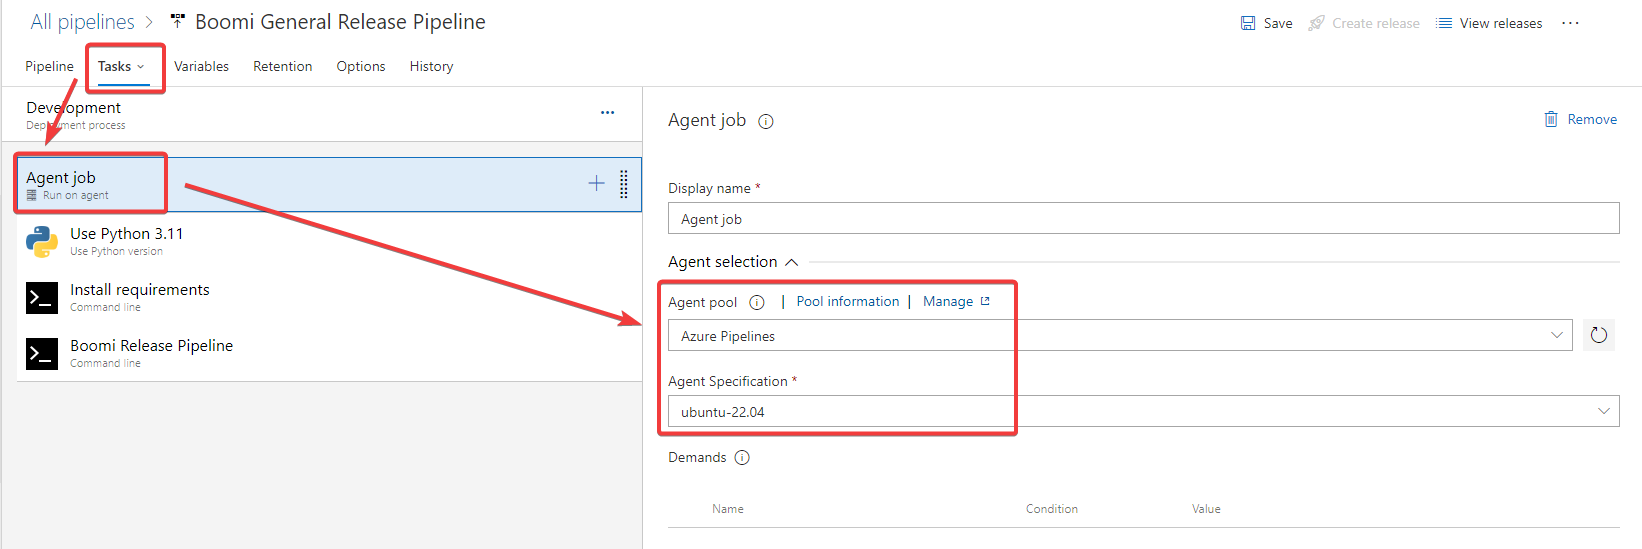
Figure 13. Release pipeline agent configuration
Update the environment variable for each Stage to match your company’s Boomi Environment shown in the image below. Set
BOOMI_ATOM_NAMEandBOOMI_ENVIRONMENT_NAMEvariables per stage. Ensure that the values match the Boomi Environment that you want to deploy to.BOOMI_RELEASE_FILEusesconf/release.jsonin the example. conf would be the directory within boomi-cicd-release that contains the release file.
Environment Variable |
Values |
|---|---|
BOOMI_ATOM_NAME |
<boomi-atom-name> |
BOOMI_ENVIRONMENT_NAME |
<boomi-environment-name> |
BOOMI_RELEASE_FILE |
<boomi-release-file> |
Update the pre-deployment conditions (triggers, approvals) for each stage as shown below.
Clone an existing stage to add a new stage. Click delete to remove stages.
Click the variable tab and associate the variable library groups from step 4. Set the variable group scope to Release.
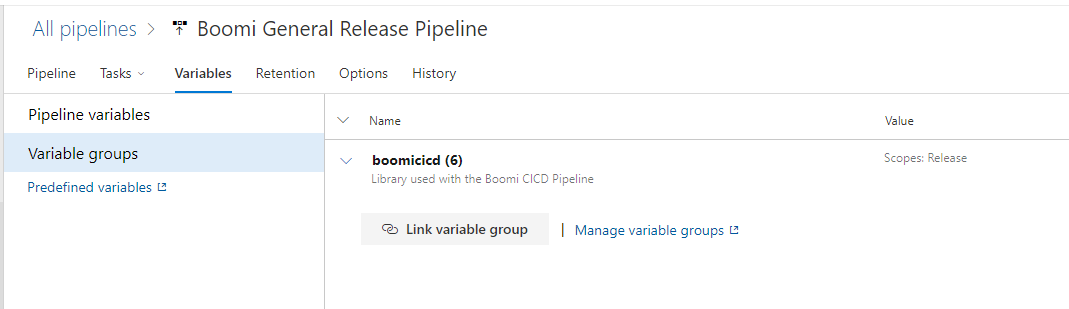
Figure 14. Release pipeline variables
Click save. The release pipeline is now ready to be used.
2.5 Optional: Approvals on Production
If you want to add approvals on Production stage, you can do so by clicking on the Production stage and then enable Pre-deployment approvals. An approver search box will appear. Search for the approvers group, add it, and then click save.
Users who can approve must at a minimum have the role of Release Administrator in Azure DevOps. This role will allow for them to approve the deployments to production environment, but not allow them to edit the release pipeline.
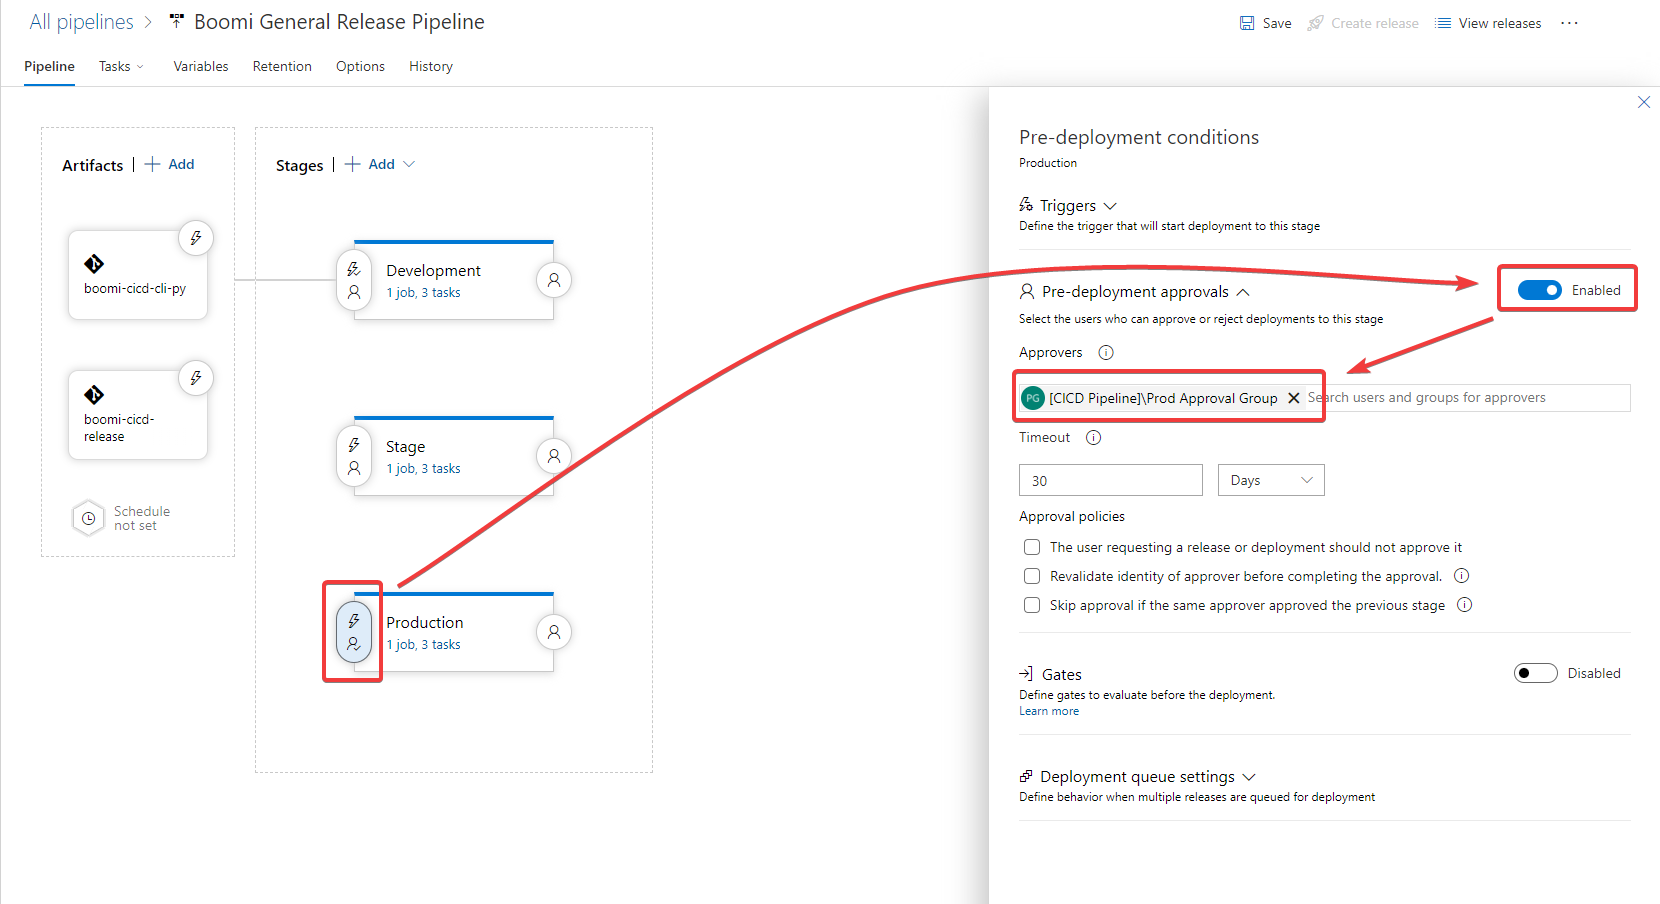
Figure 15. Release Pipeline Pre-deployment Approvals
2.6 Run the Release Pipeline
A new release can be created by going back to Pipeline -> Release Pipeline -> Boomi General Release Pipeline. The click Create release in the top right. The BOOMI_RELEASE_FILE is configurable if a different file needs to be used. Once create is clicked, it will automatically trigger a deployment to Development Stage. Once complete, one can manually deploy to higher environments. Any changes to the configuration file will require a new release to be created and triggered.